
IDA ICE Export of Heating Load and Cooling Load and Import into Polysun
What is this interface intended for?
This interface lets you calculate a building’s heating and/or cooling load in the IDA ICE building simulation software, and then apply these results to energy system simulation in Polysun. This enables the optimal integration of both tools within projects.
Engineers and building simulation specialist value the following advantages:
- Heating Load and Cooling Load can be determined precisely in IDA ICE using dynamic building simulation
- For larger projects involving multiple generators or sources, such as hospitals, schools, residential developments, hotels and multi-family buildings, using Polysun to simulate the thermal energy system significantly reduces the time spent on design, while making the most of the strengths of both tools
- The wide range of energy system design configurations and scenarios in Polysun is appreciated by all stakeholders.
- Compliance documentation (e.g. BREEAM or LEED) can be reliably produced and detailed design variants can be developed
The most influential design parameter, heating load and cooling load, is transferred directly between the two software solutions – IDA ICE and Polysun. The following FAQ article provides step-by-step guidance for project teams using both tools.
In which format can files be imported into Polysun?
Polysun expects two separate profiles with hourly values: one for heating and one for cooling. These profiles can be imported either via a .CSV file or by copying and pasting in Excel. Importing takes place separately for each profile in the building component or the source/sink component.
Step 1: Open building model and run simulation
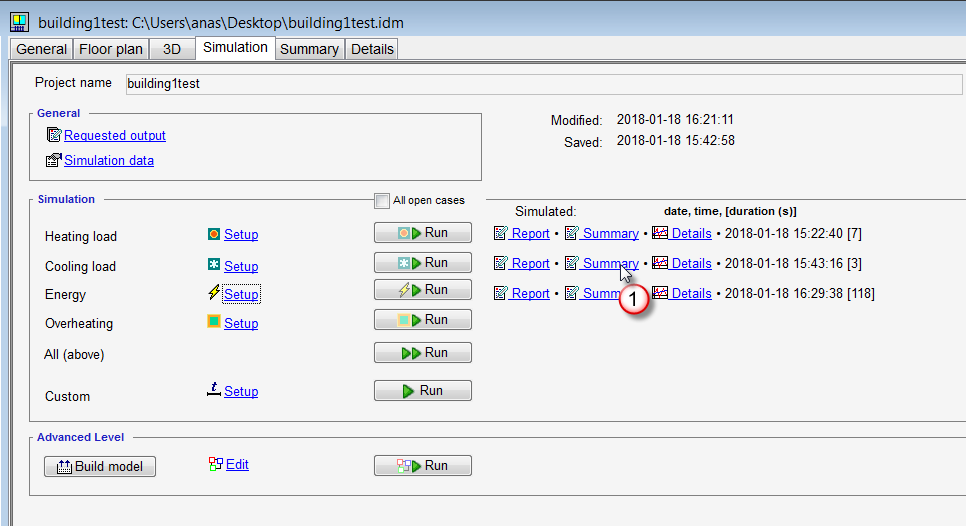
Open your project in IDA ICE and ensure that the simulation has been fully calculated and completed.
Step 2: Open results for heating and cooling demand
Click on Summary and select Heating or Cooling. Click on the corresponding graph for the building and display the table. The cooling and heating load are given in W. The time period must be set to a full year (January 1 to December 31 = 8,760 hourly values).
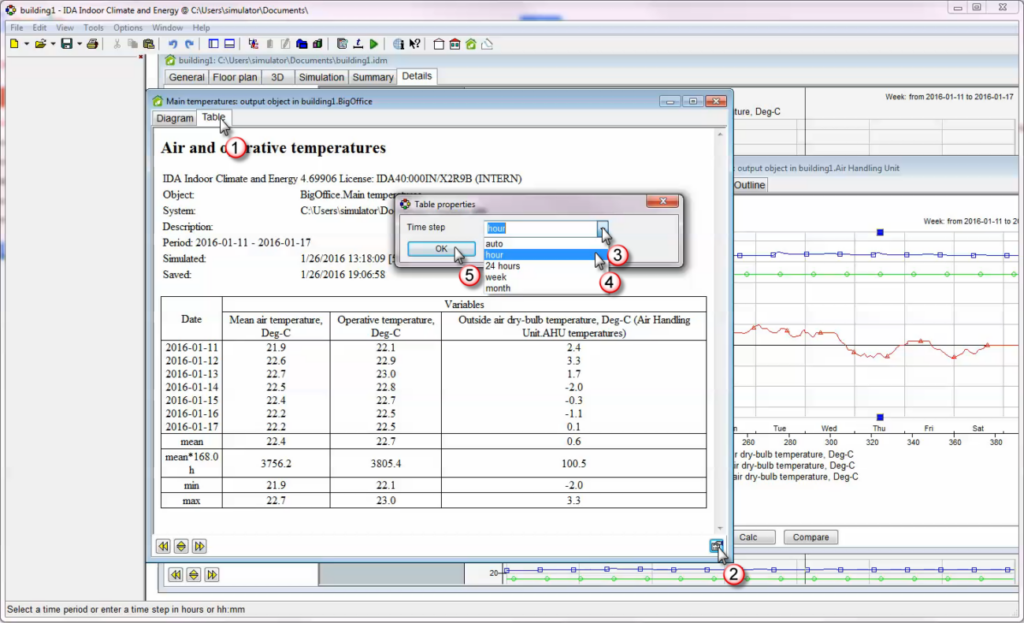
Switch to table view, open table properties, and set time step to Hour
Step 3: Export data from IDA ICE
Using the right mouse button, “Select All” (Ctrl + A), copy the data to the clipboard (Ctrl + C) and paste the data into excel (Crtl + V). Newer versions of IDA ICE no longer provide direct CSV export. You can find additional information here.
Note about the IDA ICE version.
In older version, there were sometimes direct export functions as CSV. In newer versions, the export is typically done as described above via:
Table view → Copy & Paste → Excel
Step 4: Clean up the file in Excel
Prepare the dataset:
- Keep only required columns
- Rename columns (e.g. time, Heating load, Cooling Load)
- Check the load values are in W
- Ensure all 8760 hours are included
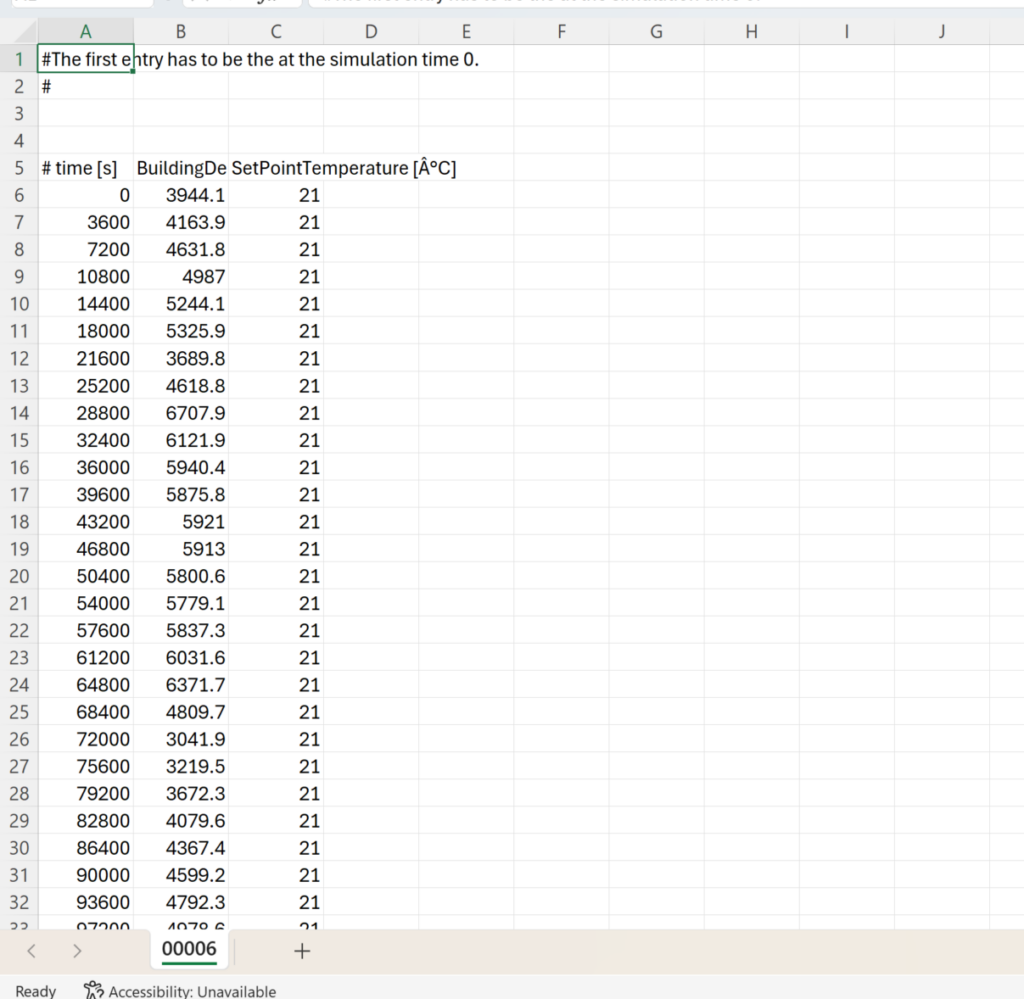
CSV for Import into Polysun
In addition to the method described above using copy & paste, Polysun can also import .csv files directly.
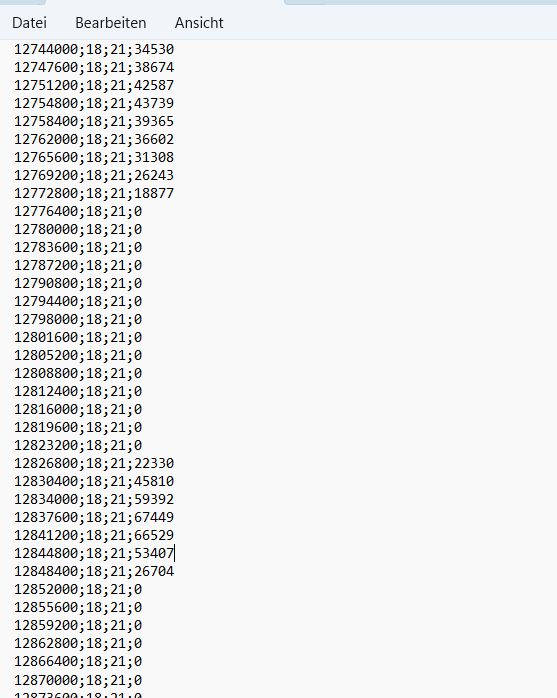
In order for Polysun to read the file directly as a CSV, the CSV must be saved as follows:
CSV Hourly Values Heating Load
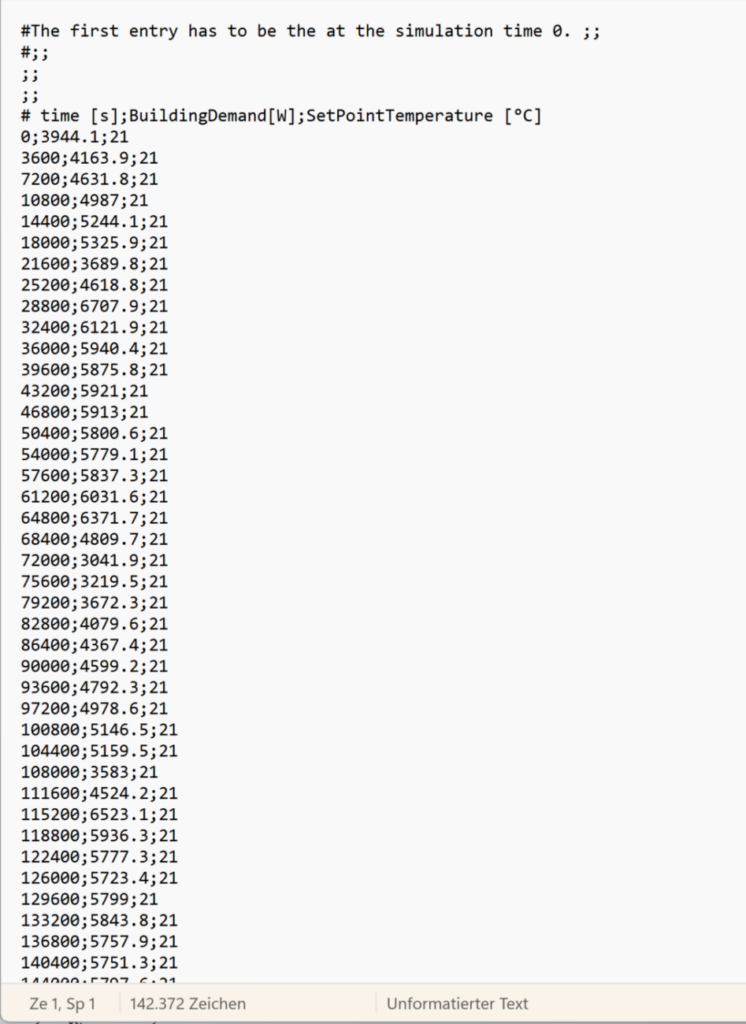
- Time must be in seconds (column 1)
- Separator: semicolon (;)
- Encoding: UTF-8 recommended
CSV Hourly Values Cooling Load
Import Heating and Cooling Load into Polysun
In Polysun, load profiles can be imported from various building simulation programs and PV planning tools.
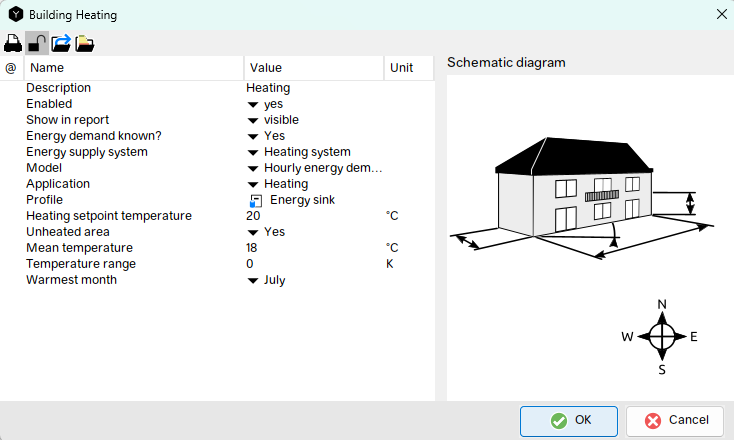
By double-clicking on the building, you can configure the building component in Polysun.
Under the Energy demand tab, select the Hourly Energy demand model.
Step 5a: Import heating load via copy/paste
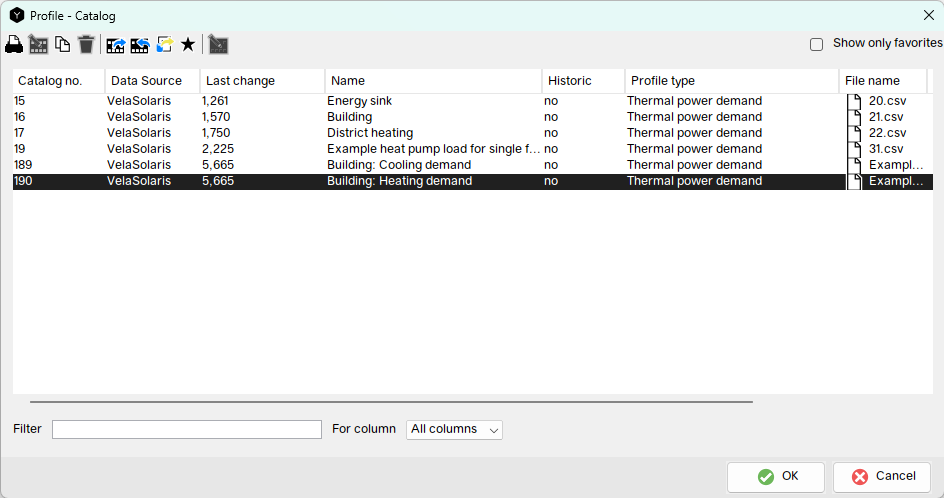
Click on the catalog for the profile. Select the catalog No. 190. This is the template for hourly heating demand profiles.
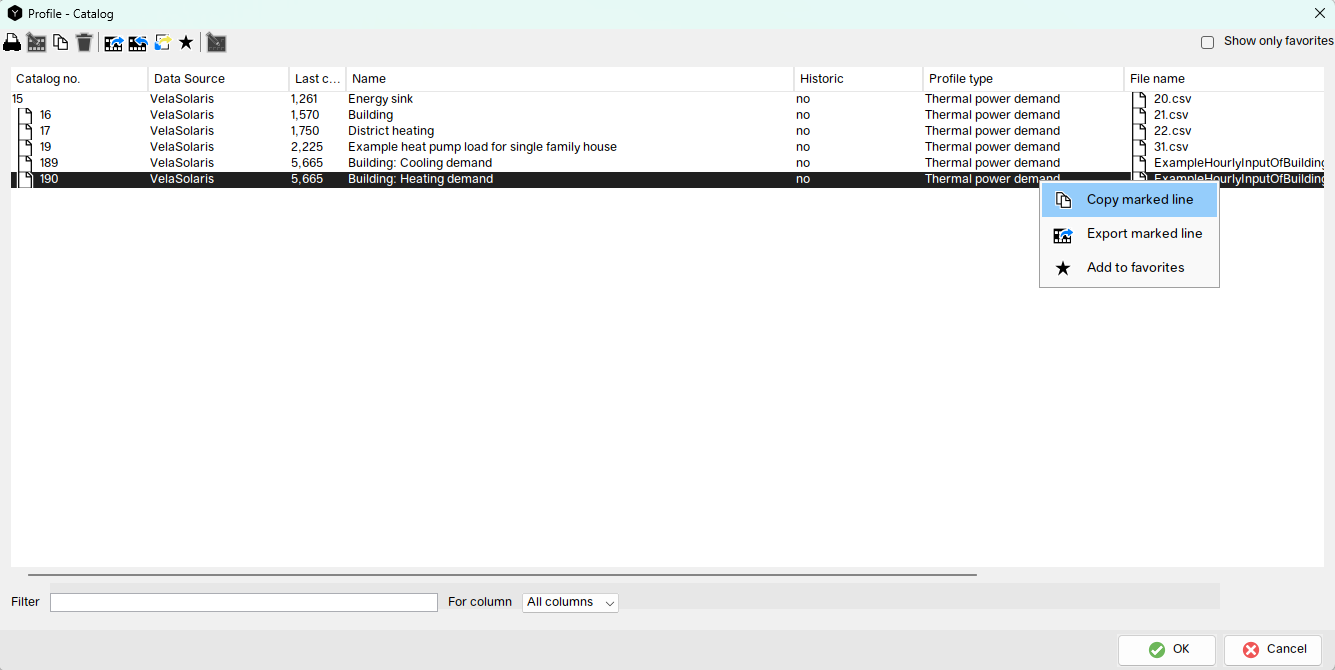
Copy the entry by clicking on it with the right mouse button and selecting “Copy marked line”. Use this copy to create your own profile.
Give the copied catalogue entry a meaningful name. Polysun will then generate a new catalog entry and file name. Right-click on the row and select “Change marked line” Double-click on the file name of this new row and select “Open File” to open the file in Excel. You can now insert the data series of the heating load from the Excel file above.
Polysun opens the .csv file in a single column in Excel. In the Excel menu, select “Data” and then click the “Text to Columns” button to split the text into columns. You will now see the values in multiple columns and can paste/enter the hourly values in Column B, which correspond to the hourly heating demand. Save and close the file as described in the video below.
Important: Heating and cooling load are imported into Polysun via two separate CSV files—not via a combined file. Detailed information on the import function can be found in the Polysun manual.
Step 5b: Import heating load via CSV
In addition to the copy-and-paste method, Polysun can also import the heating requirements directly as a CSV file. For Polysun to recognize the file, it must be saved in the following folder:
C:\Users\Public\Polysun\profiles
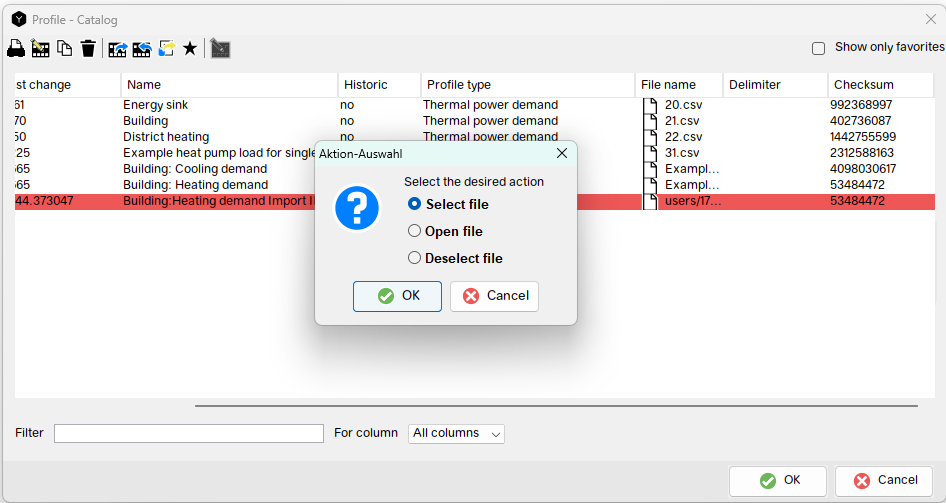
It is important that the CSV file is formatted correctly, as described in Step 4 (time in seconds, semicolon as the delimiter, UTF-8 encoding, positive values in watts). The file can then be selected directly in Polysun via the catalog, as shown in the image below.
Step 5c: Map and Import Cooling Load
The cooling load is imported separately via a dedicated profile. In Polysun, two cooling methods can be modeled: free cooling and active cooling. Currently, this requires a separate cooling loop within the simulation. We recommend using the 70l template as a starting point, alternatively, templates with free cooling are also available in the standard templates. Within this template, a profile named “Building: Cooling Demand – 250 kW” is already stored in the Source/Sink component, which describes the hourly cooling load with a peak load of 250 kW.
Unlike heating load , cooling load also requires supply and return temperatures:
- Column B: Supply Temperature
- Column C: Return Temperature
- Column D: Cooling capacity (W)
The Import is then performed analogously to step 5a or 5b.