Weather Data
One of the first steps of the project design is the selection of the weather data. Polysun provides reliable yield forecasts for more than 8400 locations worldwide, but also allows reading meteo data from a file, calculating of hourly meteo data from external monthly values and obtaining the meteo data from the location through the internet from the Meteonorm webservice.
Video: Meteorological data
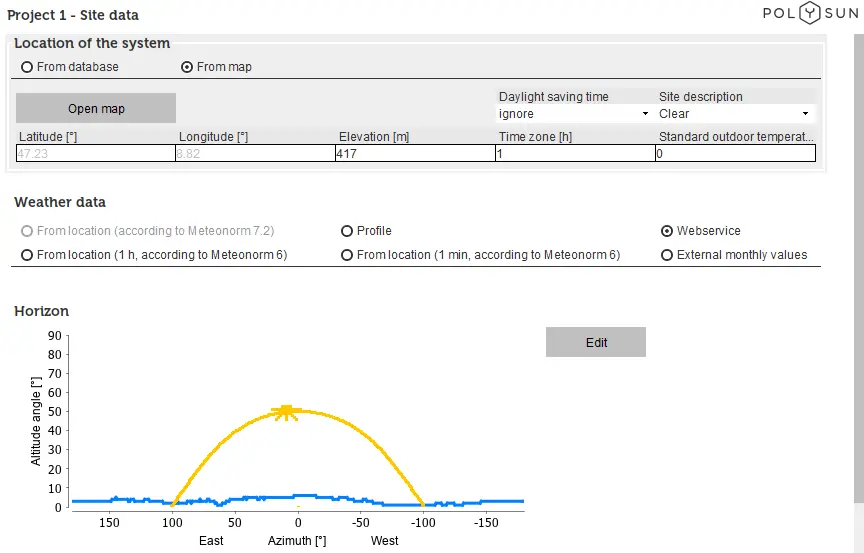
Location
The weather data dialog window can be easily accessed in the ‘Geographical Location’ in the project folder in the upper left side.

A suitable geographical location can be chosen either ‘from map’ or ‘from database’. In order to define the location from the database the following parameters shall be specified: continent, country and location of the system.
The map of the world is available at a resolution of 3 km. However, not all of the locations can be found on the map by entering the name in the field of the ‘Search’ option. In this case you would have to look for them manually on the map, the weather data will be interpolated.
The location of the system includes the continent, country and the city. You can also decide whether to apply ‘daylight saving time option’ or ignore it.
There are five options available for weather data: ‘from location (according to Meteonorm version 7.2)’, ‘from location (according to Meteonorm version 6)’, ‘Profile’, ‘External monthly values’ and ‘Webservice’.
The option ‘import weather data from Meteonorm Vers. 6’ can be chosen in order to calculate weather data for the given location by embedded Meteonorm procedure.
For Meteonorm version 6 the underlying measured weather data date from 1986 – 2005: the irradiance parameters date from 1986 – 2005, the other parameters from 1996 – 2005.
The option ‘import weather data from Meteonorm Vers. 7.2’ can be chosen in order to use embedded weather profiles available for more than 7500 locations. For this option, the location has to be chosen from the drop-down list and not from the map.
The option ‘Meteonorm version 7.2’ is recommended since it provides the more up-to-date data. The option ‘Meteonorm version 6’ is kept for backwards compatibility reasons. If the location has to be chosen specifically from the map, then the “webservice” option is recommended as it provides the most up-to-date data. However, in order to use “webservice” the internet-connection has to be provided.
For Meteonorm version 7.2 the irradiance parameters date from 1991 – 2010, for some countries from 1996 – 2015, all other parameters date from 2000 – 2009.
For more detailed information see www.meteonorm.com.
Besides the meteo data included in Polysun, many other sources are available. Thus, the option ‘Profile’ allows to import the meteo data from the file (with .CSV extension “Comma Separated Values”). In this case, the on-site measurements can be used. The software requires the following hourly weather data:
Gh Global radiation [Wh/m2]
Dh Diffuse radiation [Wh/m2]
Lh Long wave irradiation [Wh/m2]
Tamb Ambient temperature [°C]
Vwnd Wind [m/s]
Hrel Humidity [%]
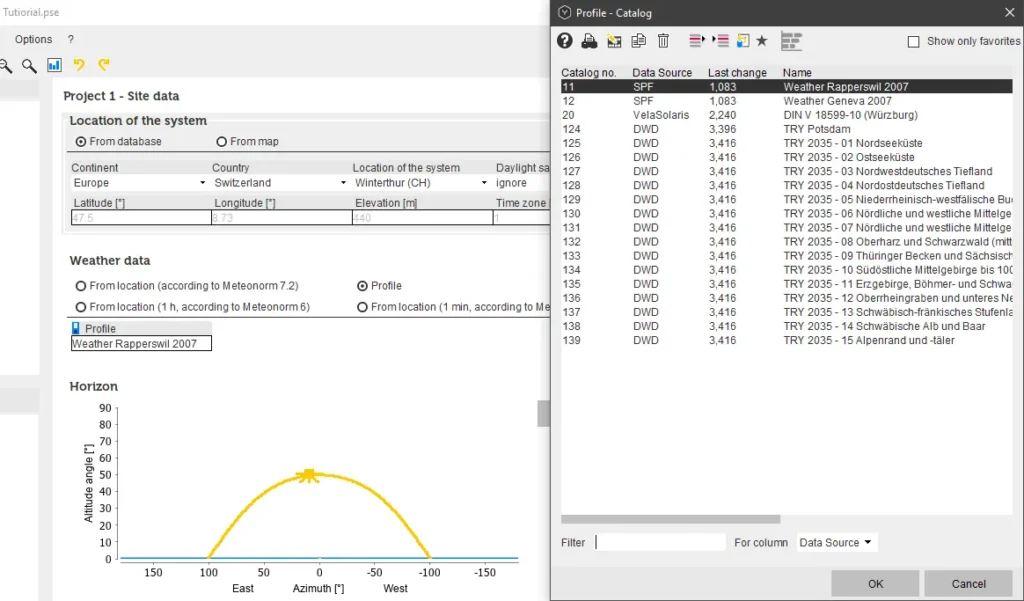
It is possible to use one of the profiles available in the catalog. Please note, that importing the weather data from a file you need to select the same location under ‘Location of the system’ since the sun path is defined from location of the system.
You can also copy one of the available Meteorological data profiles with chosen name, open it and insert the available measured weather data in the corresponding column.
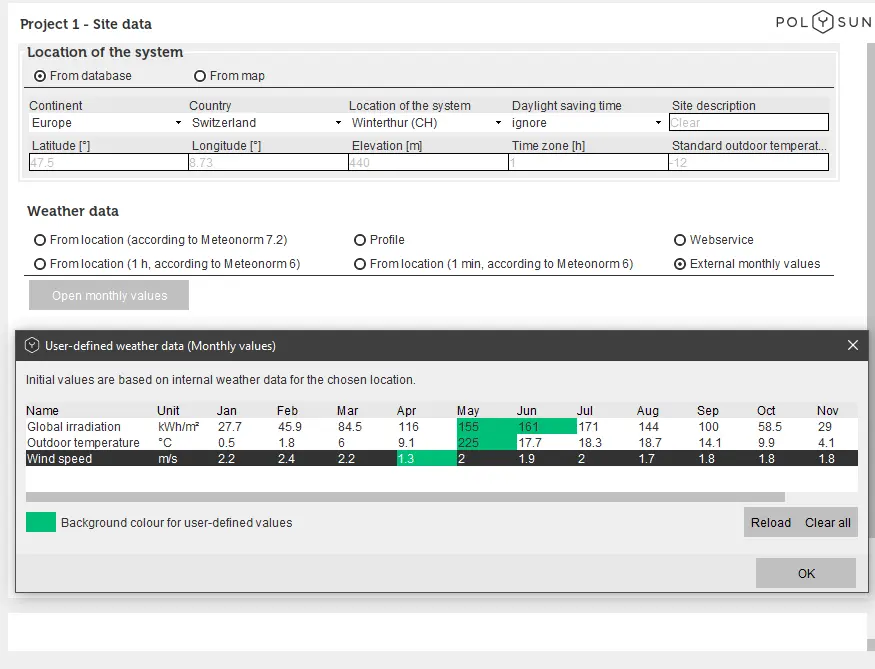
The option ‘External monthly values’ allows doing manual changes in the available monthly values. In this case the hourly meteo data is calculated from monthly values by embedded Meteonorm procedure.
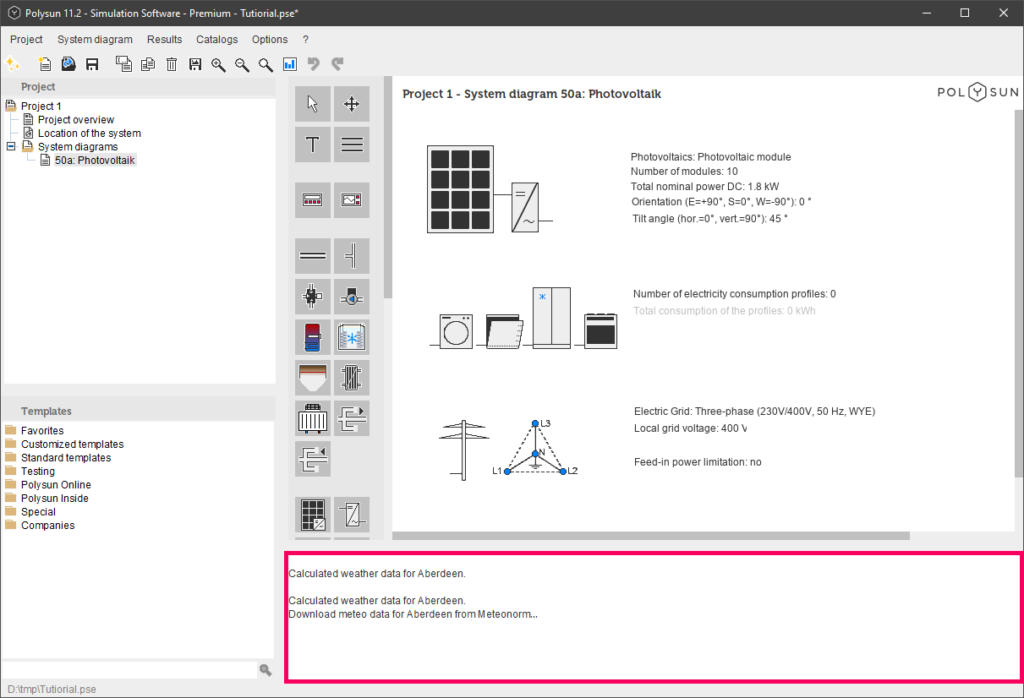
Polysun gives an opportunity to use newest weather data from Meteonorm ‘Webservice’. This weather data is dynamic and changes according to the Meteonorm website. First you can choose the ‘Webservice’ option and then switch to the system diagram. In a matter of 10-15 seconds the console (Polysun log) will show that the weather data has been successfully downloaded.
Horizon and Shading
In order to make a precise calculation of the energy yield of a solar energy system, any possible shadow creating objects, such as adjacent houses, trees, mountains, etc. shall be taken into account. Shading obstacles have even bigger influence on the solar array’s performance in winter months because of the low sun elevation. The shortest day of the year in the Northern Hemisphere, December 21st, can be used for shading calculation as a worst-case scenario.
The horizon profile as well as nearby obstruction and shadings can be simulated in the ‘Horizon editor’, which allows you to take into account the surrounding topography. The objects are taken into account based on distance and height. The dimensions of the objects are then reflected on the horizon line, allowing greater precision in site data entry and yield calculation.
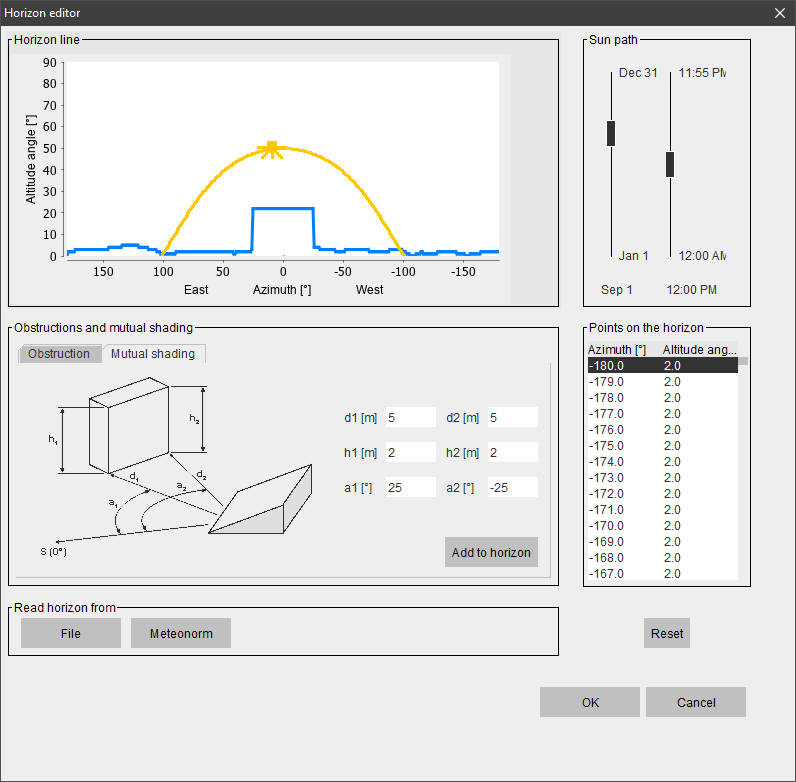
In order to define the horizon, you can click on the location of the system, selecting the project location. The ‘Horizon editor’ can be opened by clicking on “Edit”. The Horizon editor is divided into four parts. In the upper left part, there is a horizon line, which is indicated with the red line and the sun path, which is indicated with the yellow line. The sun path can be displayed throughout the year on a daily basis or during one day on an hourly basis by moving the sliding bars on the right side. If you go on the lower left part, there are obstructions and mutual shadings. In the ‘Obstruction’ tab you can enter a building or an object which is located near your PV module or solar collector. You can start by importing the profile of the horizon of the selected location. In order to do that we can click on the Meteonorm button and the horizon of the chosen location will be indicated with a red line. Then you can define the new object in the ‘Obstruction’ tab by indicating the distance to the object, the height of the object and the Azimuth angle to the left side of the object. In the ‘Mutual Shading’ tab Polysun offers a possibility for mutual sheds optimization. In this tool, you can define the location and the disposition of the PV module or solar collector area. The mutual shading depends on the shed orientation towards the southern direction (a), the distance between the rows (d), tilt angle (α) and the height of the solar collector or a PV module (w), which cause the shading.
Then you can click on the button ‘Add to Horizon’ and the object and the mutual shadings will be added in the horizon line. The Horizon profile can also be adjusted manually by inserting azimuth and elevation angles in the bottom right part of the ‘Horizon editor’. In order to delete all changes in the horizon profile, you can click the Reset button.
The Horizon profile can be also imported by a *.hor file from other tools and sources.
Video: Nearby and row-to-row shading